The purpose of this article is to present the method of controlling addressable LED strips using the example of integration with the E-NODE AM-8.3 module.
This integration allows for:
- Launching the programmed scene on the module
- Changing the brightness
To implement the example below we need:
- Gate HTTP (named HTTP)
- module E-NODE AM-8.3
- Addressable LED strip
Documentation for the E-NODE AM8.3 module can be found here
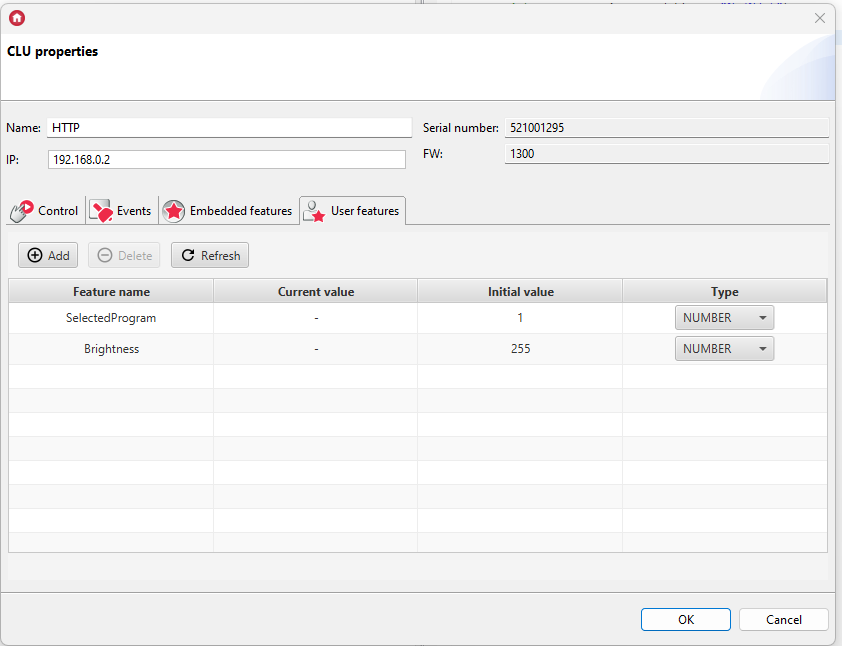
Creating user features
1. Double-click on the HTTP object to enter the module settings:
2. Go to the User Features tab and create the features you need:
- SelectedProgram - Initial value: 0 Type: number
- Brightness - Initial value: 255 Type: number
Configuration of virtual objects
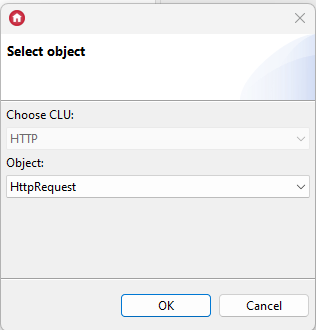
1. On the Gate HTTP module, we add the HttpRequest virtual object:
2. Enter the name of the object: ChangingBrightness_Request and complete the values of the embedded features of the object:
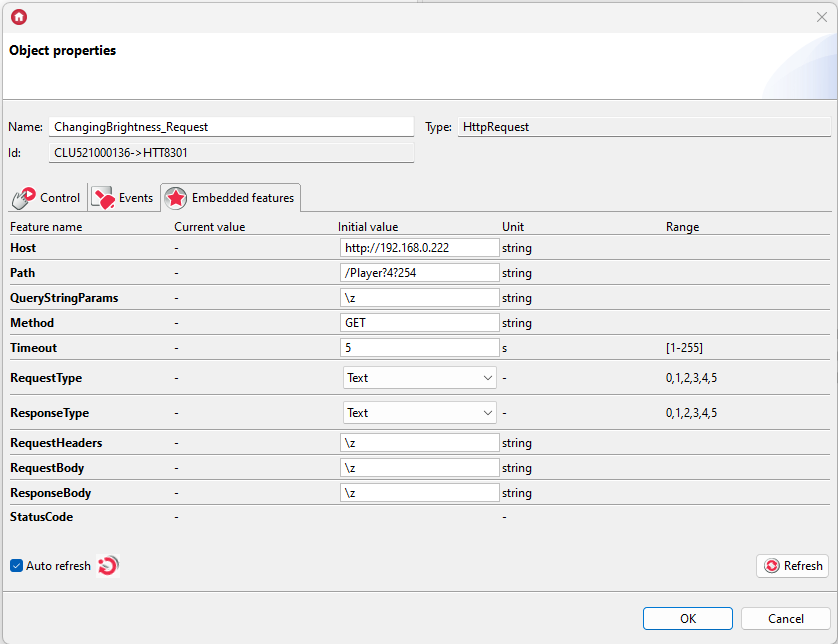
Host: http://192.168.0.222 (converter IP address)
Path: /Player?4?254
3. On the HTTP Gate module, we add another HttpRequest virtual object:
4. Enter the name of the object: ModeSelection_Request and complete the values of the embedded features of the object:
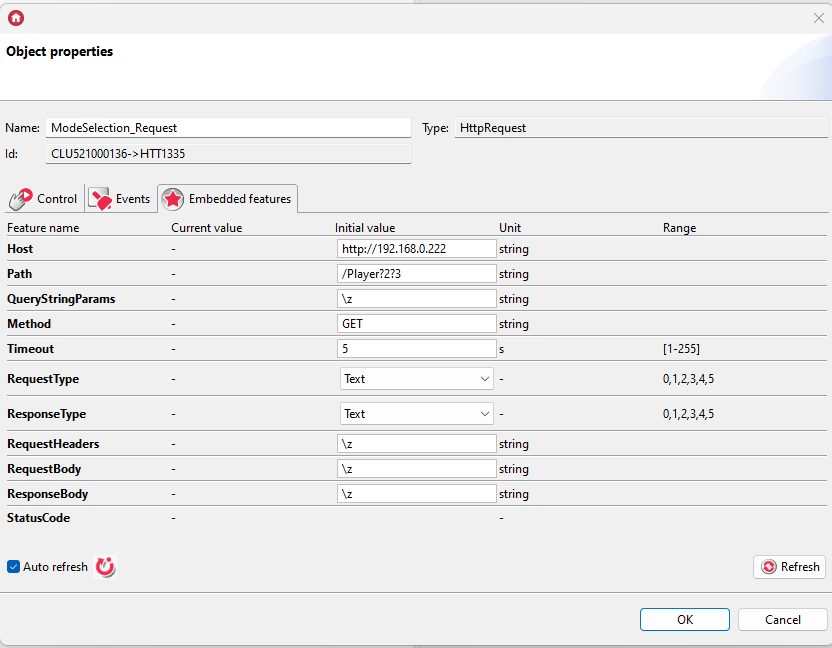
Host: http://192.168.0.222 (converter IP address)
Path: /Player?2?3
5. On the HTTP Gate module, we add another HttpRequest virtual object:
6. Enter the name of the object: ReadStatus and complete the values of the embedded features of the object:
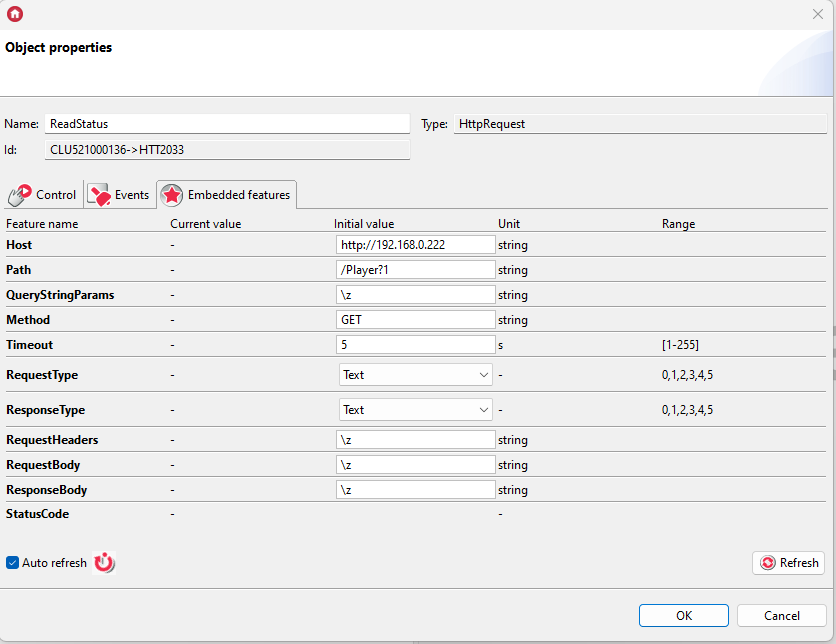
Host: http://192.168.0.222 (converter IP address)
Path: /Player?1
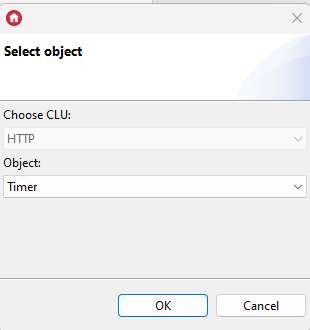
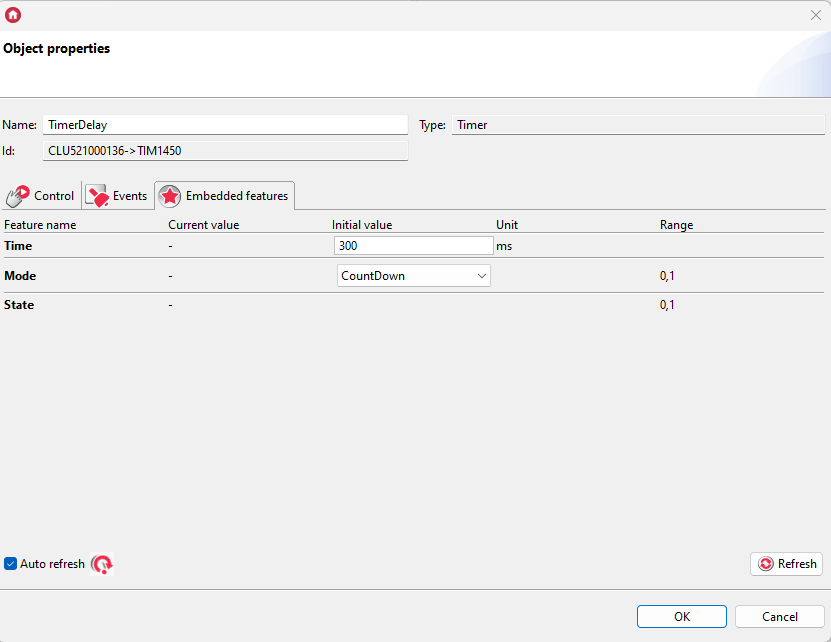
7. We add the Timer virtual object to the Gate HTTP module:
8. Enter the name of the object: TimerDelay and complete the values of the embedded features of the object:
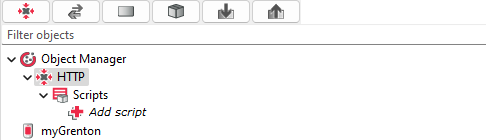
Creating scripts
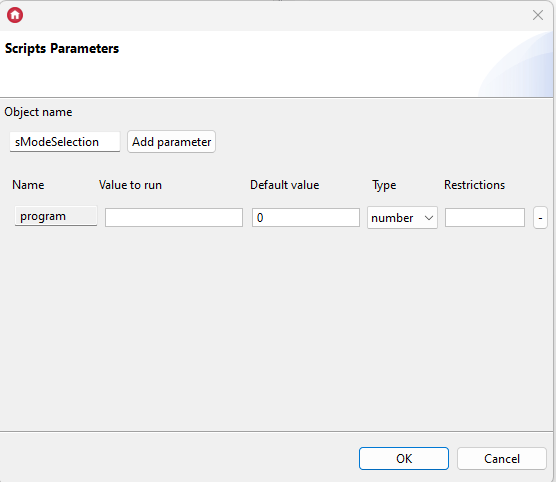
1. Add the sModeSelection script
Add a script parameter with the name program and type number
Paste the following script content:
local path = "/Player?2?" .. program
HTTP->ModeSelection_Request->SetPath(path)
HTTP->ModeSelection_Request->SendRequest()
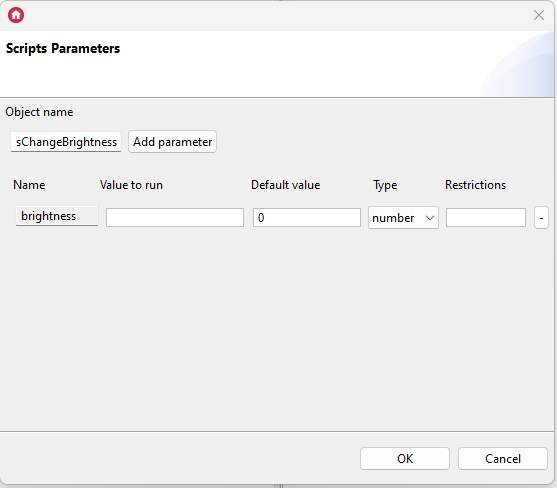
2. Add the sChangeBrightness script
Add a script parameter named brightness and type number
Paste the following script content:
local path = "/Player?4?" .. brightness
HTTP->ChangingBrightness_Request->SetPath(path)
HTTP->ChangingBrightness_Request->SendRequest()
3. Add the sReadStatus script
Wklej poniższą treść skryptu:
local data = HTTP->ReadStatus->ResponseBody
HTTP->SelectedProgram = string.match(data, "%d+")
HTTP->Brightness = string.match(data, "%,(%d+)")
Assigning scripts to objects
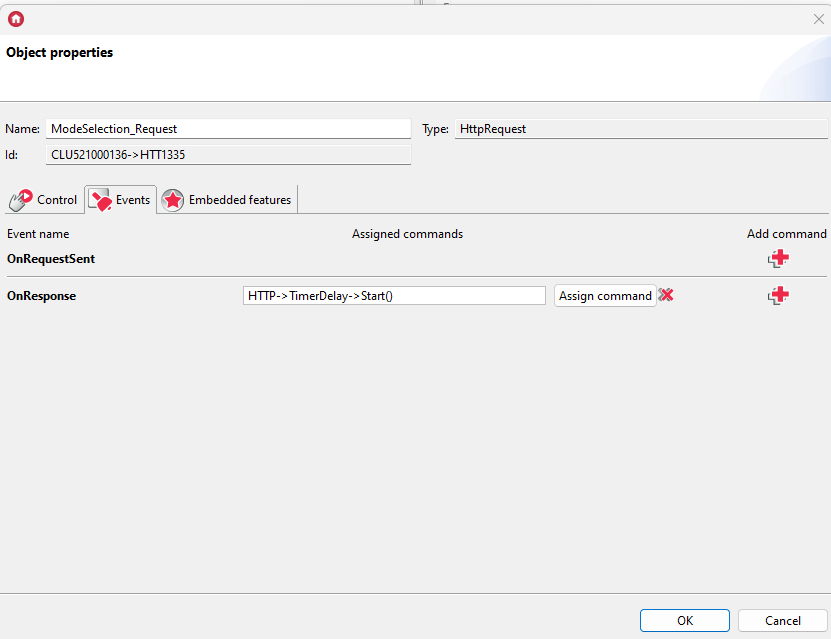
1. Assign the Start() method of the TimerDelay virtual object to the OnResponse event of the ModeSelection_Request object:
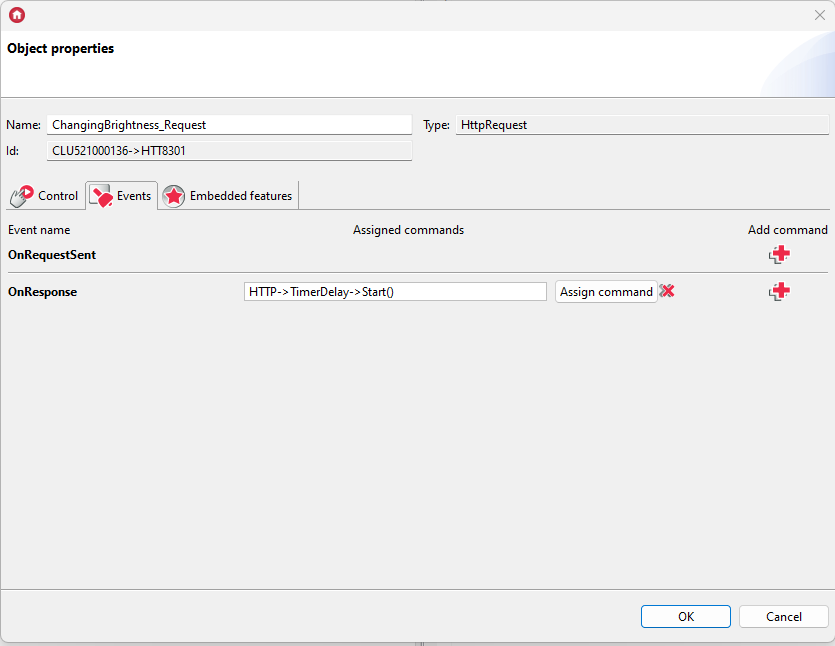
2. Assign the Start() method of the TimerDelay virtual object to the OnResponse event of the BrightnessChange_Request object:
3. Assign the sReadState() script to the OnResponse event of the ReadState object.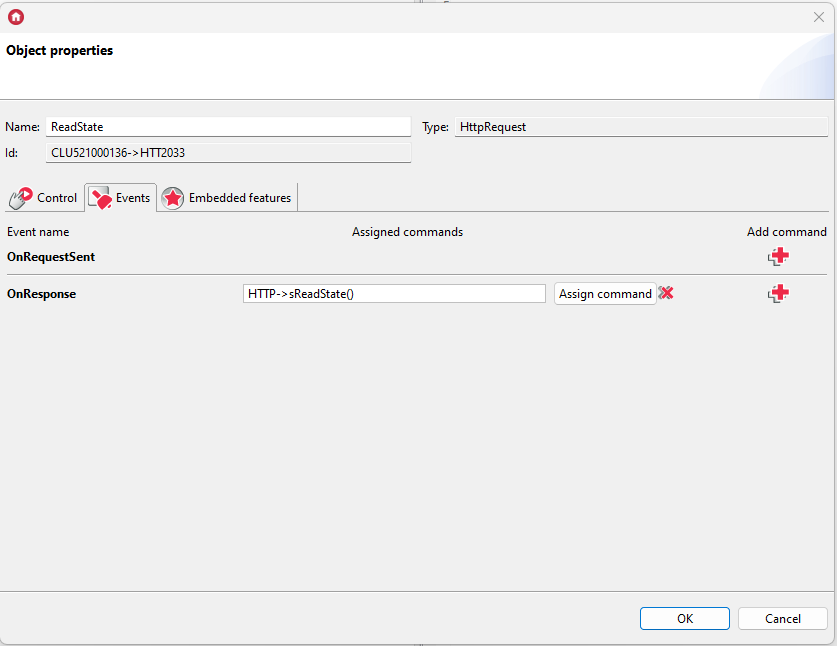
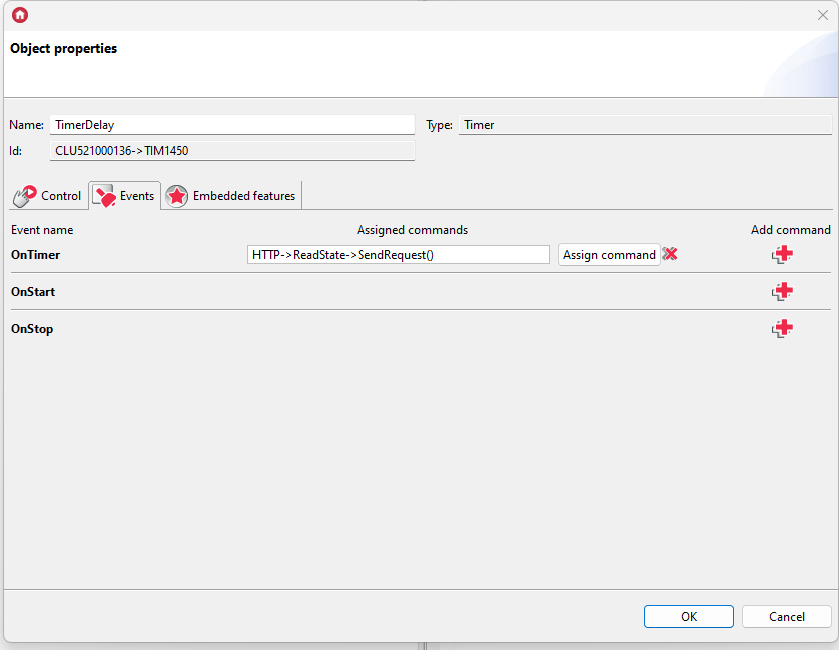
4. Assign the SendRequest() method of the ReadState virtual object to the OnTimer event of the TimerDelay object:
Module control
To turn on the programmed scene, call the sModeSelection script with a parameter specifying the program number. This can be done, for example, using the scene widget. This widget should be configured as follows: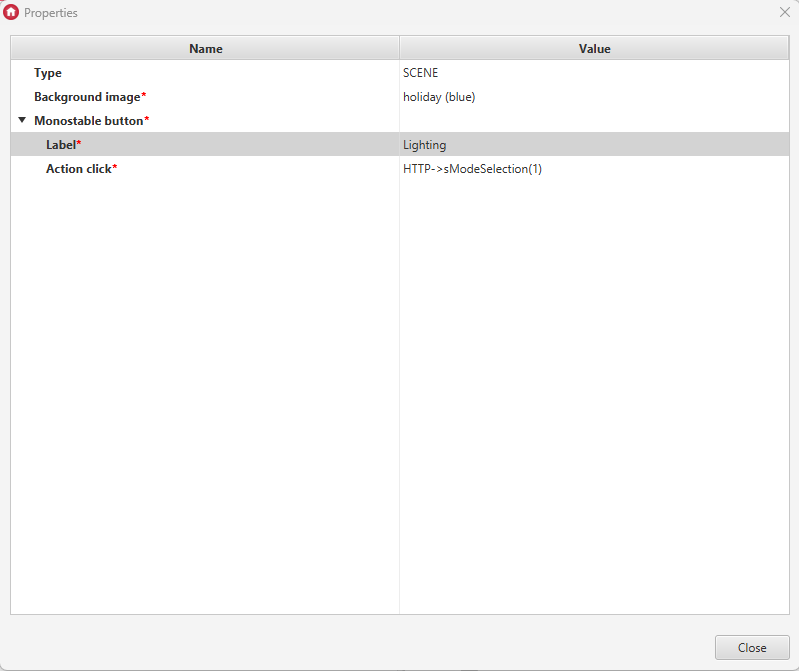
Thanks to this configuration, we can run the program previously saved on the module.
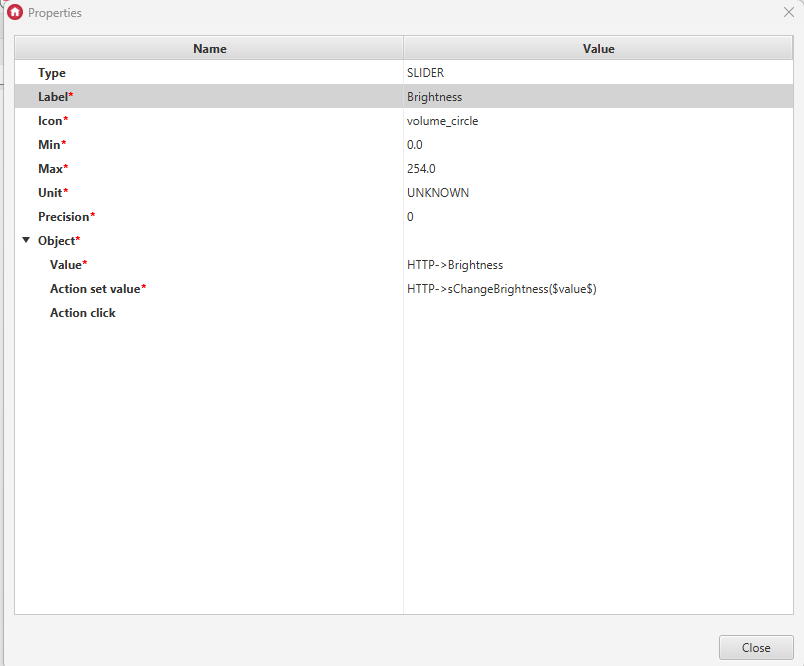
To control the brightness, call the sChangeBrightness script with the parameter value you want to set. This can be done, for example, via the slider widget. This widget should be configured as follows: