Attention! The example uses the second generation Gate Modbus module with FW 1.4.1-2334!
The purpose of this article is to present the method of controlling addressable LED strips using the example of integration with the E-NODE AM-8.3 module.
This integration allows for:
- Launching the programmed scene on the module
- Changing the brightness
To implement the example below we need:
- Gate Modbus (named Modbus)
- E-NODE AM-8.3 module
- Addressable LED strip
Documentation for the E-NODE AM8.3 module can be found here. Information about Modbus registers can be found here.
Configuration of virtual objects
1. On the Gate Modbus module, add the ModbusClient virtual object:
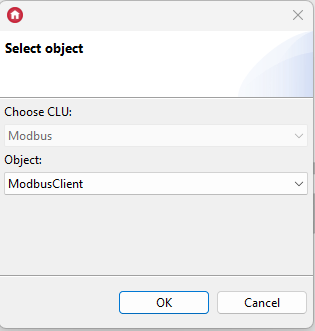
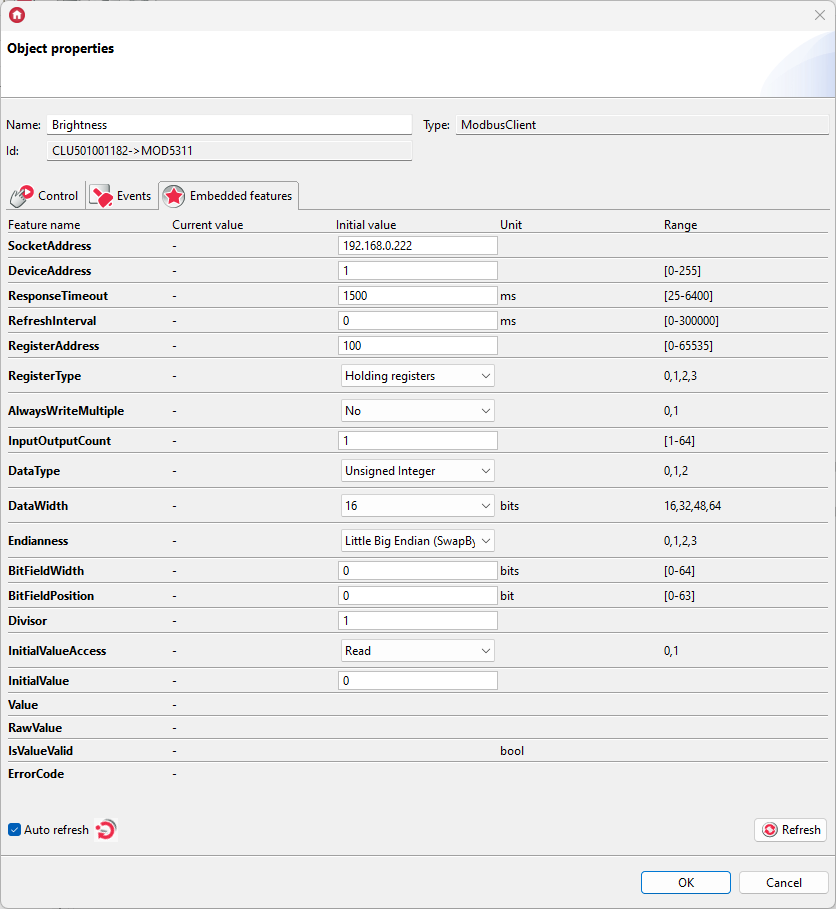
2. Enter the name of the object: Brightness and complete the values of the embedded features of the object:
3. On the Gate Modbus module, add the ModbusClient virtual object:
4. Enter the name of the object: ProgramSelect and complete the values of the object's embedded features:

5. The configuration created in this way is sent to the Gate Modbus module.
Module control
To enable a programmed scene, call the WriteValue method of the ProgramSelect object with a parameter specifying the program number. This can be done, for example, using the scene widget. This widget should be configured as follows:

Thanks to this configuration, we can run the program previously saved on the module.
To control brightness, call the WriteValue method of the Brightness object with the parameter value you want to set. This can be done, for example, via the slider widget. This widget should be configured as follows:
