The purpose of this article is to present how to integrate the LG air conditioner by the PDRYCB500 module with the Grenton Smart Home system via the Modbus RTU communication protocol.
The documentation is available here.
This integration allows us, e.g:
- Turning on / off the air conditioner
- Airflow rate control
- Changing the set temperature
To realize integration, we need:
- Gate Modbus (named Gate_Modbus)
- LG air conditioner
- LG PDRYCB500 module
Creating user features:
1. Double-click the ModbusName to enter the module settings
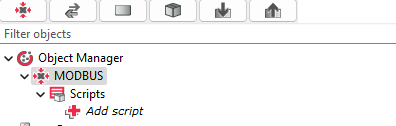
Go to the "User Features" tab and create features:
- AC_BEDROOM_FAN_SPEED_LOW Initial value: 0 Type: number
- AC_BEDROOM_FAN_SPEED_MEDIUM Initial value: 0 Type: number
- AC_BEDROOM_FAN_SPEED_HIGH Initial value: 0 Type: number
- AC_BEDROOM_MODE_AUTO Initial value: 0 Type: number
- AC_BEDROOM_MODE_VENT Initial value: 0 Type: number
- AC_BEDROOM_MODE_COLD Initial value: 0 Type: number
- AC_BEDROOM_MODE_WARM Initial value: 0 Type: number
Configuration of Modbus virtual objects
The integration has been prepared for a device with the following Modbus communication parameters:
- Device adress: 5
- Baud rate: 9600
- Stop bits: 1
- Parity: None
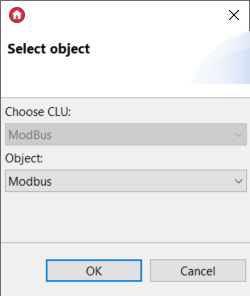
1. Create a Modbus virtual object.
2. For the settings of the converter as above - complete the values of the Embedded features of virtual objects as follows:
* Device state: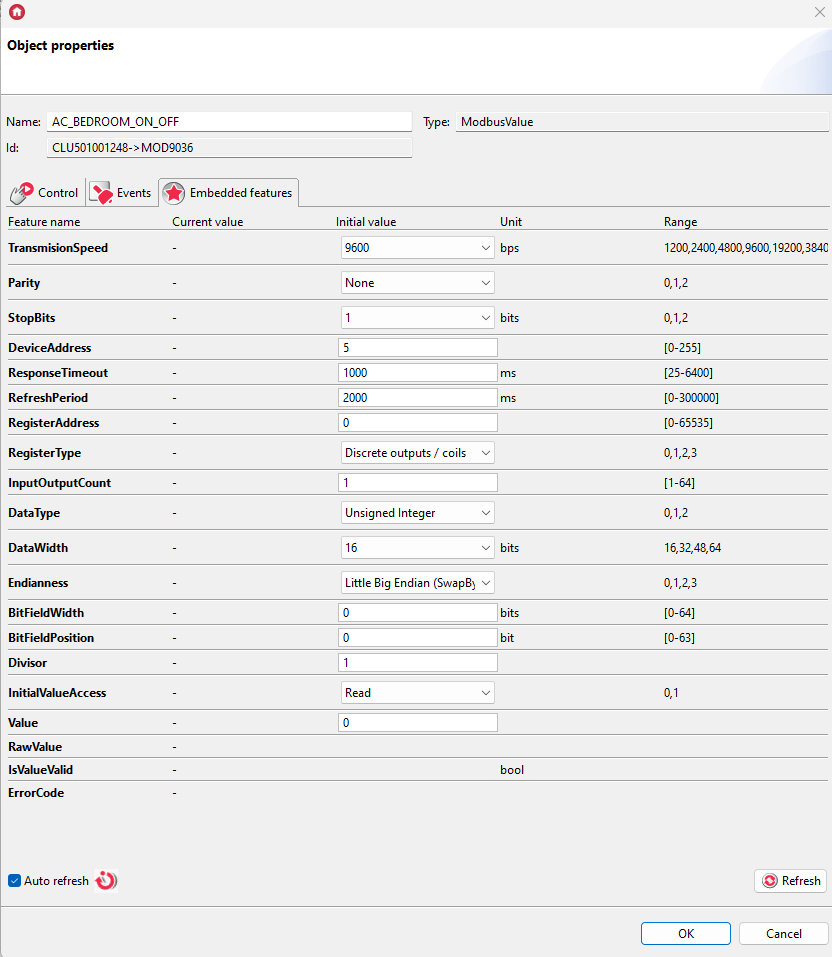
* Mode: 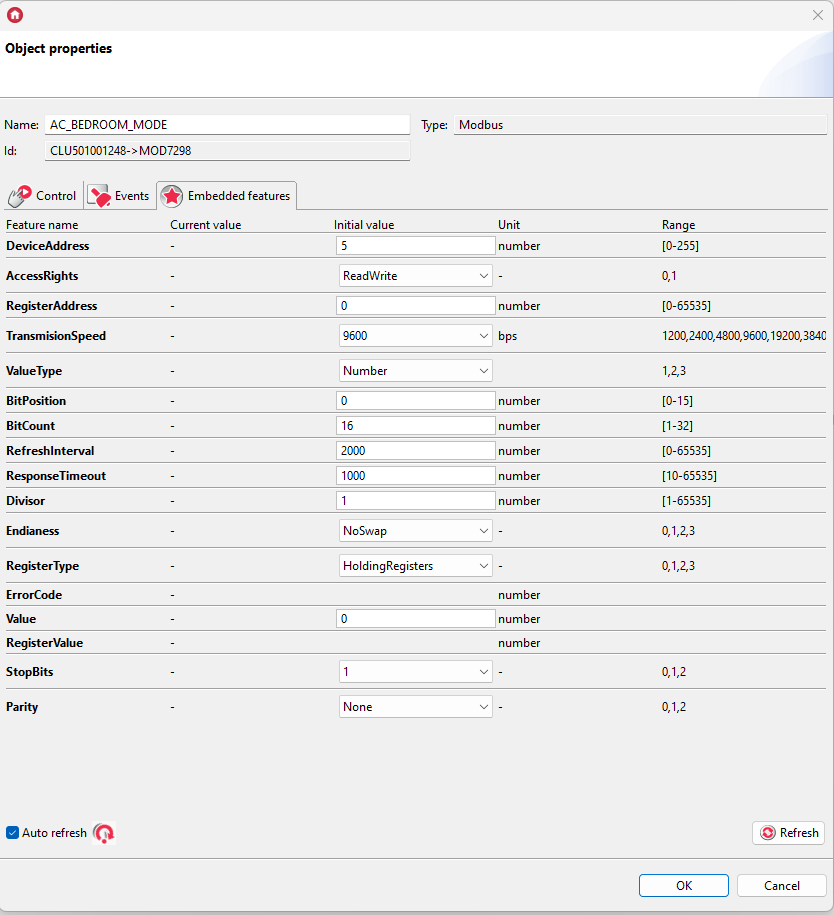
* Read temperature: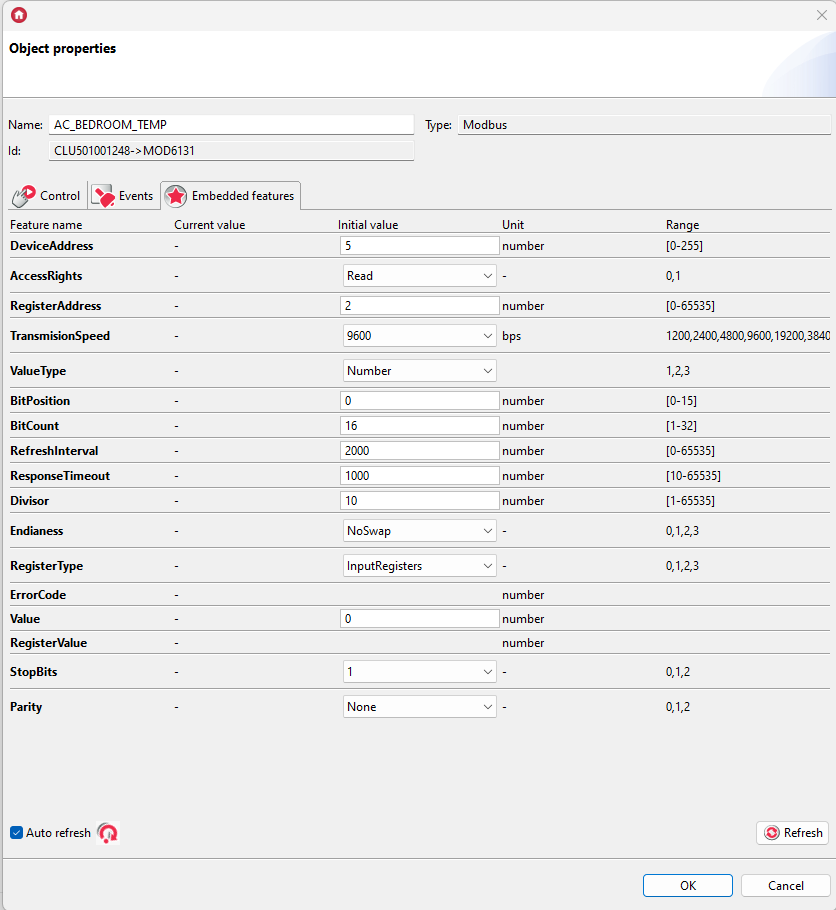
* Set temperature: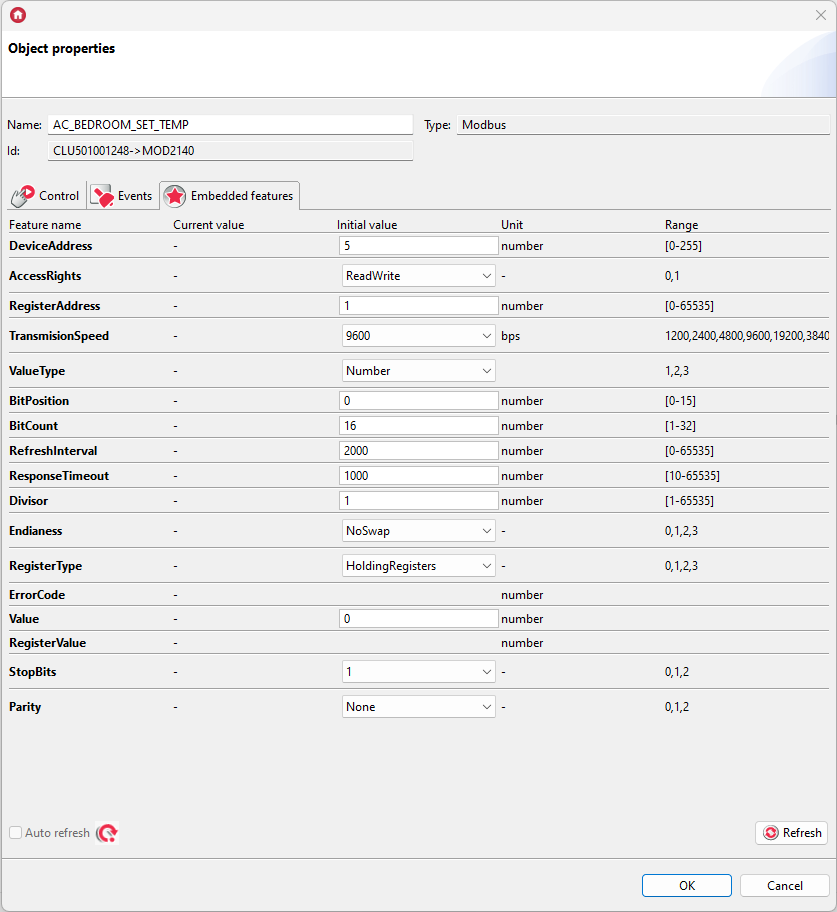
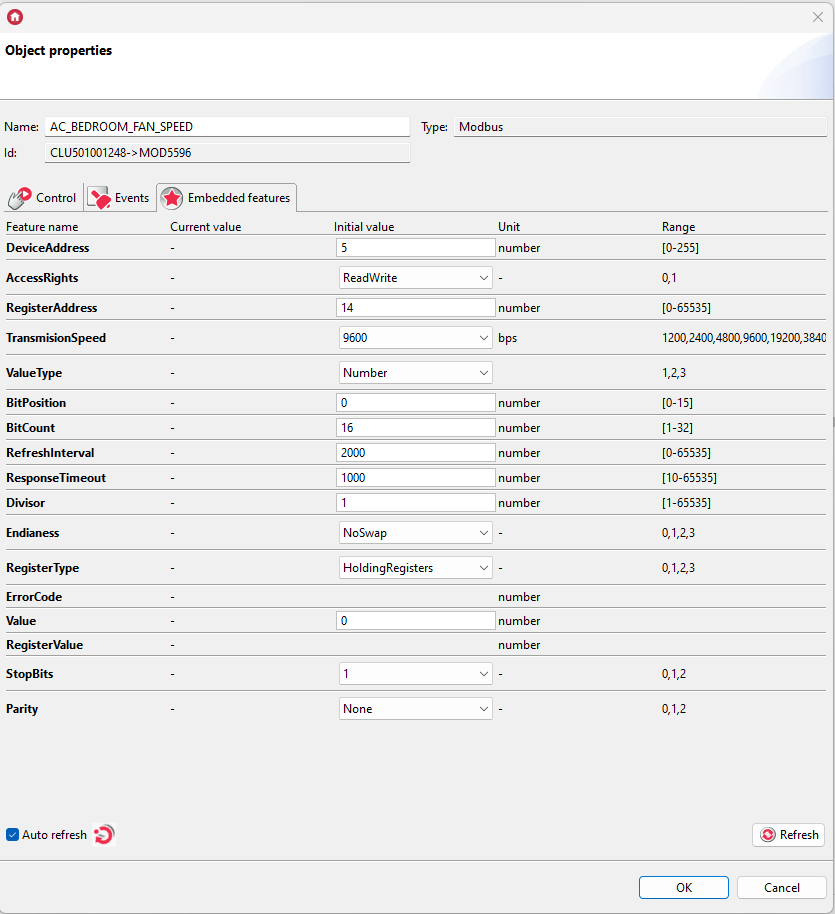
* Fan speed:
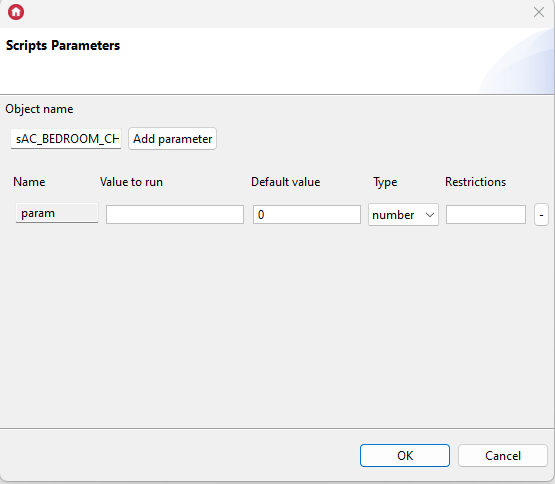
3. Add script sAC_BEDROOM_CHANGE_TEMP:
if(param==1 and MODBUS->AC_BEDROOM_TEMPERATURE_SET->Value>18) then
MODBUS->AC_BEDROOM_TEMPERATURE_SET->SetValue(MODBUS->AC_BEDROOM_TEMPERATURE_SET->Value-1)
end

if(param==2 and MODBUS->AC_BEDROOM_TEMPERATURE_SET->Value<28) then
MODBUS->AC_BEDROOM_TEMPERATURE_SET->SetValue(MODBUS->AC_BEDROOM_TEMPERATURE_SET->Value+1)
end
Add parameter to the above script. Parameter should have name param, type number and default value 0.
4. Add script sAC_BEDROOM_MODE:
if MODBUS->AC_BEDROOM_MODE->RegisterValue == 0 then
MODBUS->AC_BEDROOM_MODE_AUTO = 0
MODBUS->AC_BEDROOM_MODE_VENT = 0
MODBUS->AC_BEDROOM_MODE_COLD = 1
MODBUS->AC_BEDROOM_MODE_WARM = 0
end
if MODBUS->AC_BEDROOM_MODE->RegisterValue == 2 then
MODBUS->AC_BEDROOM_MODE_AUTO = 0
MODBUS->AC_BEDROOM_MODE_VENT = 1
MODBUS->AC_BEDROOM_MODE_COLD = 0
MODBUS->AC_BEDROOM_MODE_WARM = 0
end
if MODBUS->AC_BEDROOM_MODE->RegisterValue == 3 then
MODBUS->AC_BEDROOM_MODE_AUTO = 1
MODBUS->AC_BEDROOM_MODE_VENT = 0
MODBUS->AC_BEDROOM_MODE_COLD = 0
MODBUS->AC_BEDROOM_MODE_WARM = 0
end
if MODBUS->AC_BEDROOM_MODE->RegisterValue == 4 then
MODBUS->AC_BEDROOM_MODE_AUTO = 0
MODBUS->AC_BEDROOM_MODE_VENT = 0
MODBUS->AC_BEDROOM_MODE_COLD = 0
MODBUS->AC_BEDROOM_MODE_WARM = 1
end
Assign sAC_BEDROOM_MODE script to the OnChange Event in AC_BEDROOM_MODE object: 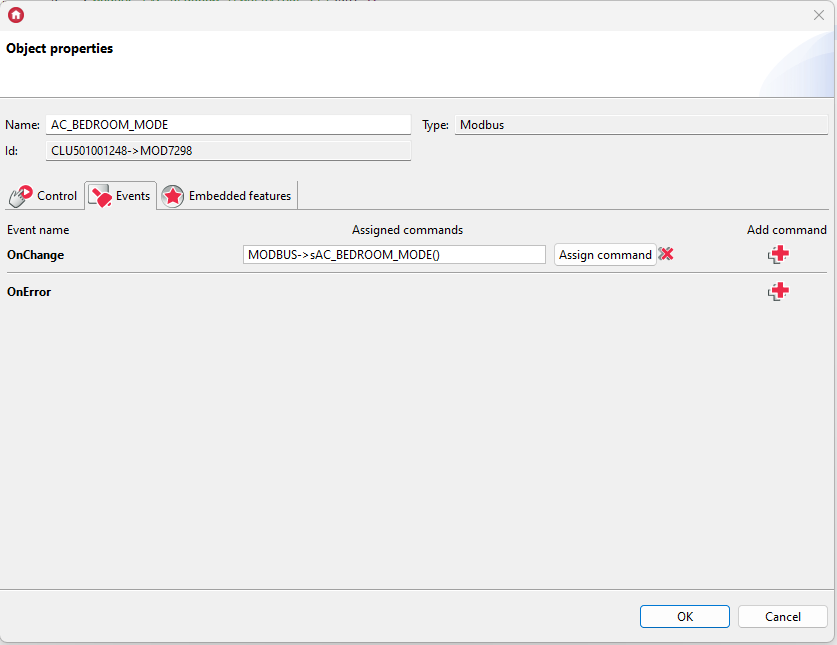
5. Add script sAC_BEDROOM_FAN_SPEED:
if MODBUS->AC_BEDROOM_FAN_SPEED->RegisterValue == 1 then
MODBUS->AC_BEDROOM_FAN_SPEED_LOW = 1
MODBUS->AC_BEDROOM_FAN_SPEED_MEDIUM = 0
MODBUS->AC_BEDROOM_FAN_SPEED_HIGH = 0
end
if MODBUS->AC_BEDROOM_FAN_SPEED->RegisterValue == 2 then
MODBUS->AC_BEDROOM_FAN_SPEED_LOW = 0
MODBUS->AC_BEDROOM_FAN_SPEED_MEDIUM = 1
MODBUS->AC_BEDROOM_FAN_SPEED_HIGH = 0
end
if MODBUS->AC_BEDROOM_FAN_SPEED->RegisterValue == 3 then
MODBUS->AC_BEDROOM_FAN_SPEED_LOW = 0
MODBUS->AC_BEDROOM_FAN_SPEED_MEDIUM = 0
MODBUS->AC_BEDROOM_FAN_SPEED_HIGH = 1
end
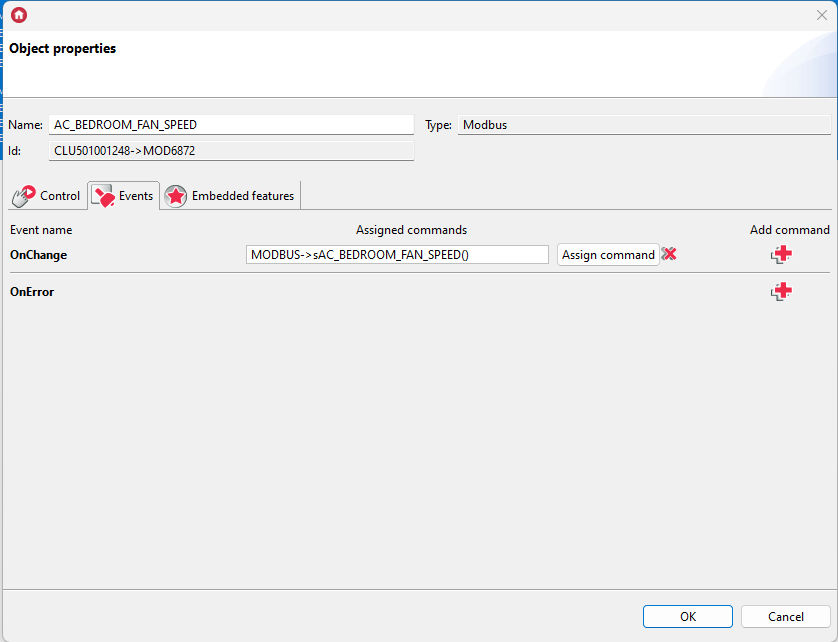
Assign sAC_BEDROOM_FAN_SPEED script to the OnChange Event in AC_BEDROOM_FAN_SPEED object:
6. Send the configuration to the Gate Modbus module.
Creating the myGrenton interface to control air conditioning
1. Create an ON_OFF widget and configure it as follows: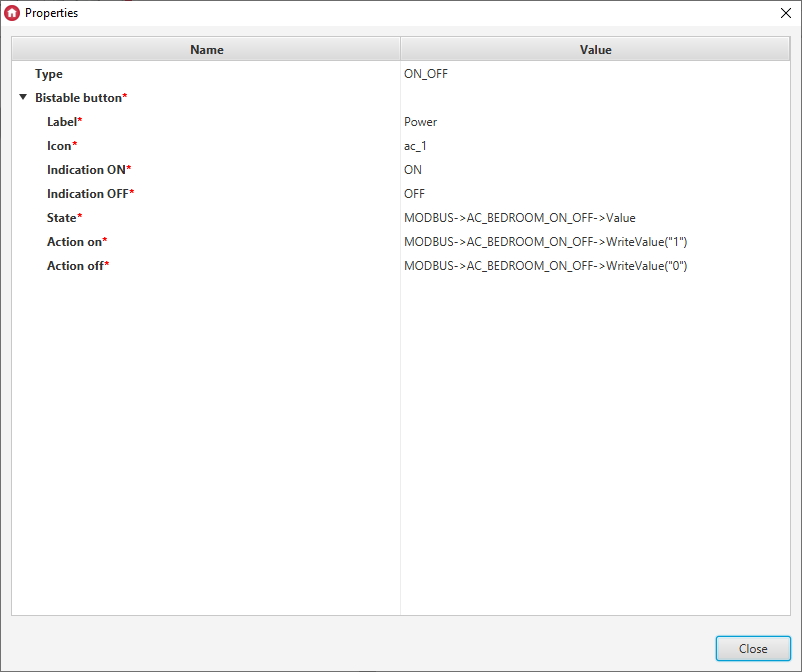
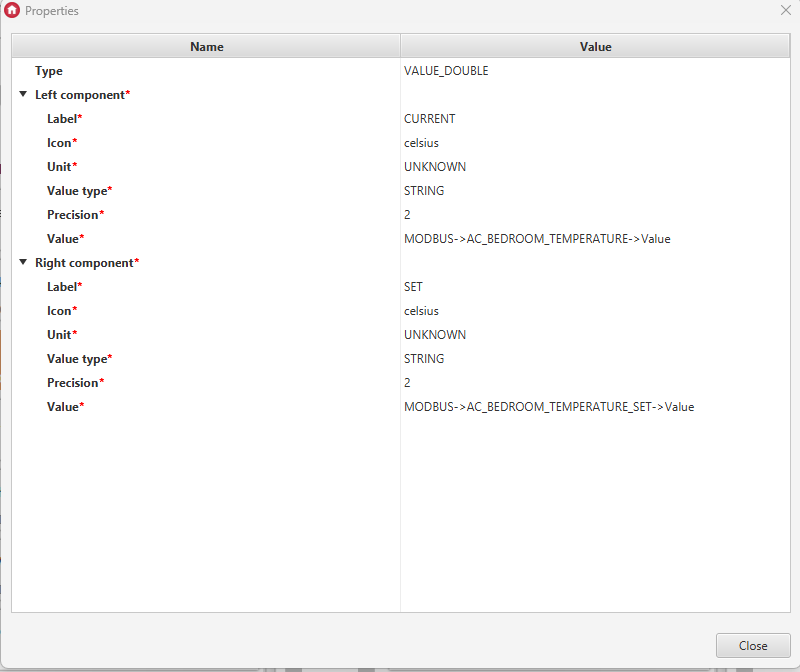
2. Create an VALUE_DOUBLE widget and configure it as follows:
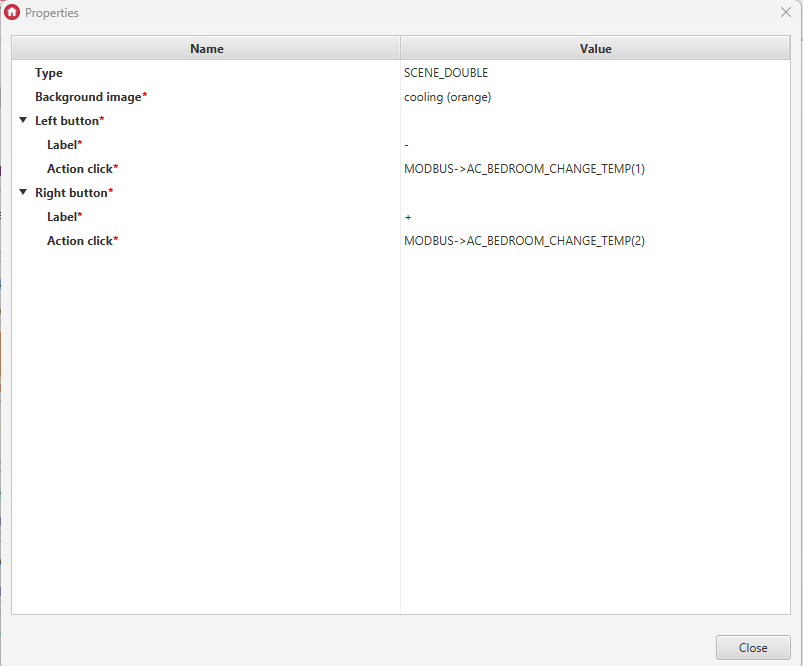
3. Create an SCENE_DOUBLE widget and configure it as follows:
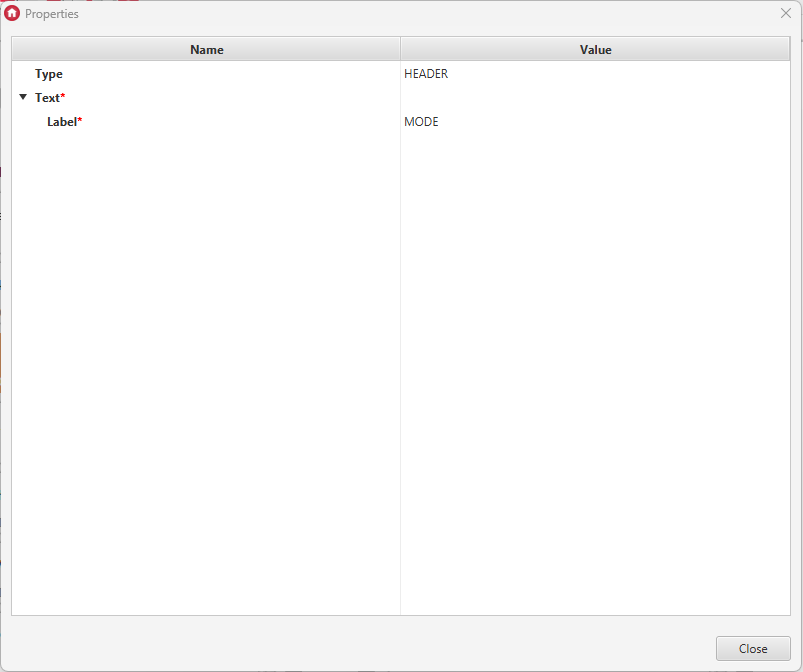
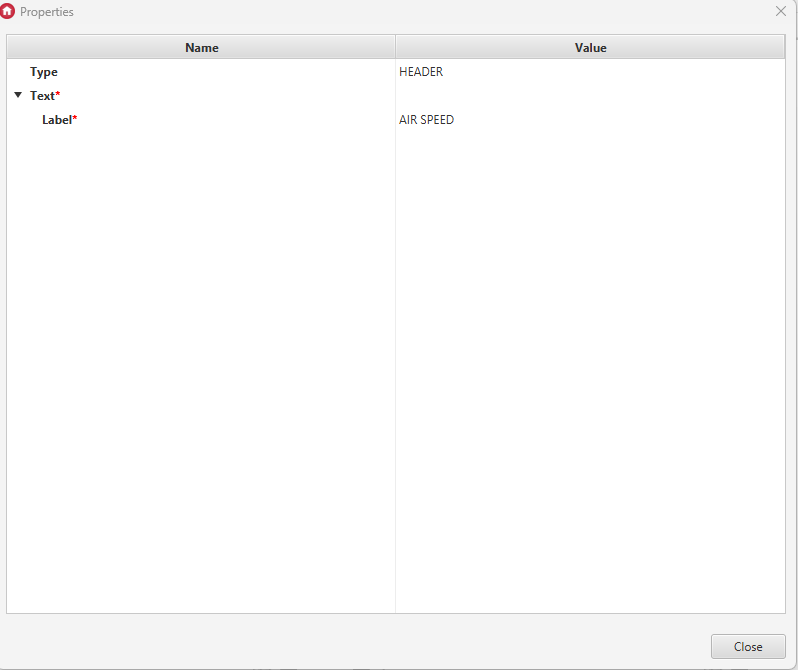
4. Create an HEADER widget and configure it as follows:
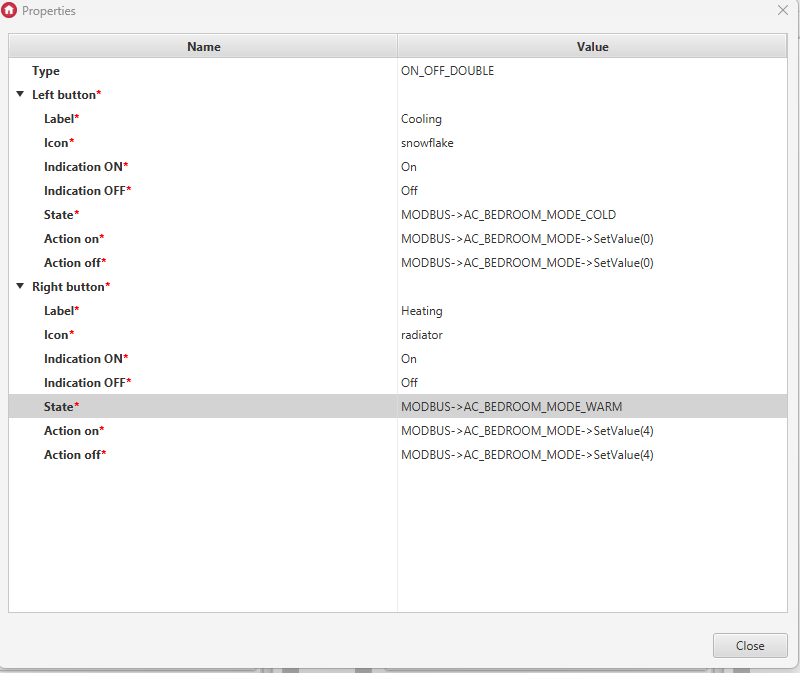
5. Create an ONOFF_DOUBLE widget and configure it as follows:
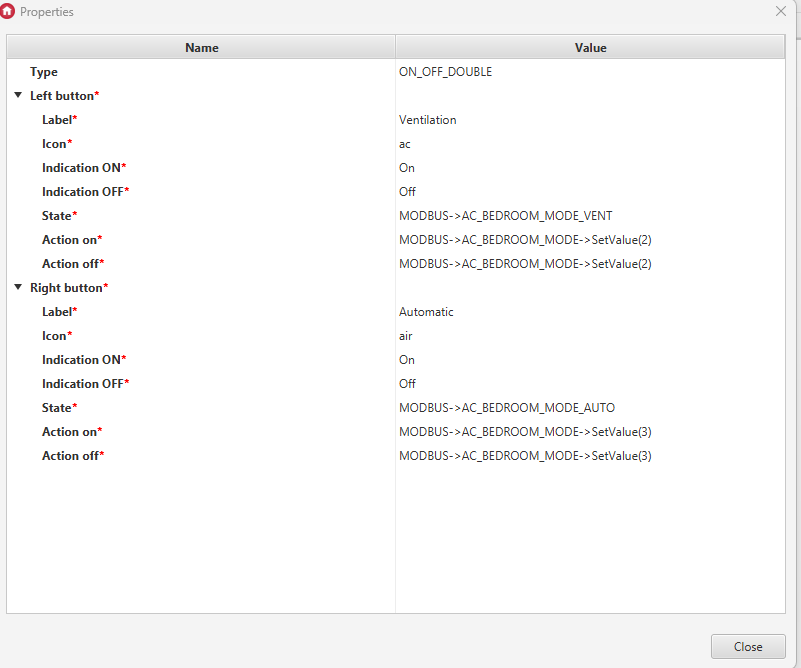
6. Create an ONOFF_DOUBLE widget and configure it as follows:
7.Create an HEADER widget and configure it as follows:
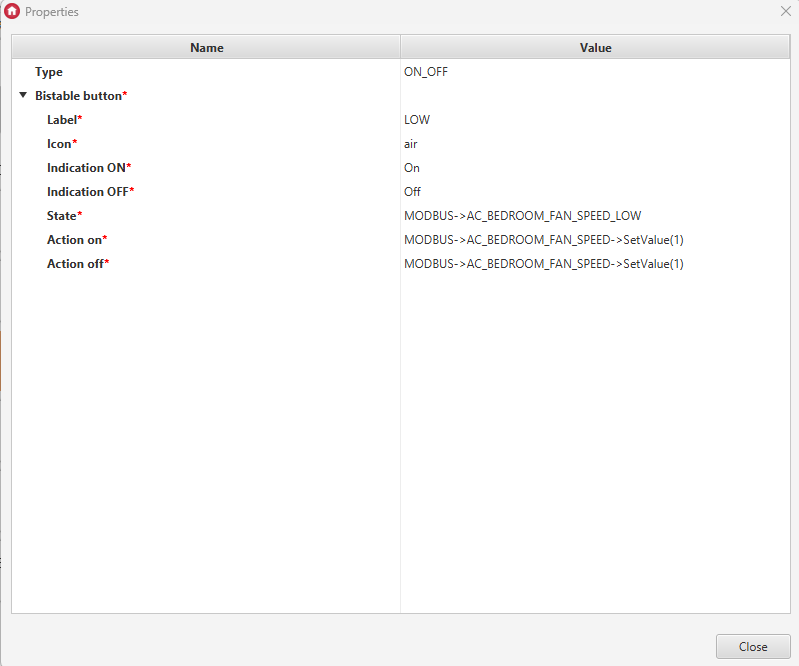
8.Create an ONOFF widget and configure it as follows:
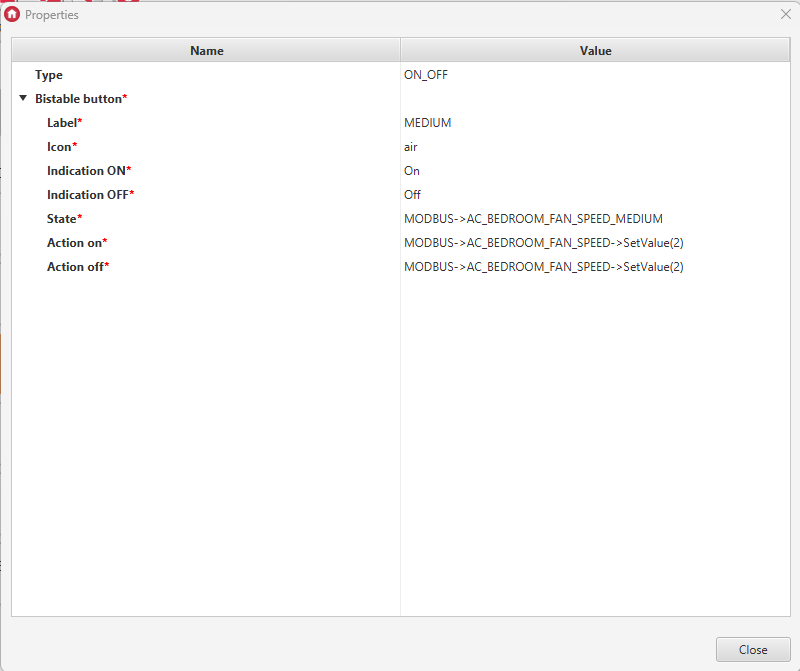
9. Create an ONOFF widget and configure it as follows:
10. Create an ONOFF widget and configure it as follows:

After sending the interface to the phone, it will look like this:
