The offer of Grenton building automation system devices includes an RGBW LED controller designed to control, among other things, LED strips. Thanks to the open logic of the Grenton system, we can adapt the system to control two-color CCT LED strips. With one RGBW LED module, we can control two independent two-color LED circuits. The instructions below contain steps on how to prepare the control of a single, two-color LED strip in terms of on/off control (clicking the button) and setting the color of the light (holding the button). The manual also includes control using the myGrenton application.
To implement the following functionality you need:
- CLU Unit
- LED RGBW Driver
- input module DIGITAL IN, smartpanel GRENTON SMART PANEL OLED or touch panel GRENTON TOUCH PANEL
- environment for creating the logic - Object Manager
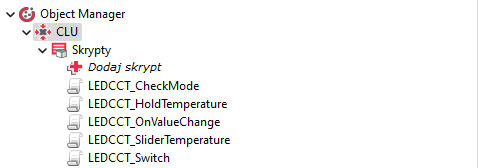
- scripts - named in the sample project
- LEDCCT_HoldTemperature - Color change operation with push button,
- LEDCCT_OnValueChange - Status update,
- LEDCCT_CheckMode - Changing the state (flag) of the color change,
- LEDCCT_SliderTemperature - Color changing with slider,
- LEDCCT_Switch - support for controlling the LED circuit on the on/off basis.
- User features - in the example project named:
- CCT_OnOff - current state of the LED circuit.
- CCT_Mode - current direction of color change,
- CCT_Value - the current value of the LED circuit light intensity,
CLU central unit configuration
1. Double-click the CLU icon to enter the module settings
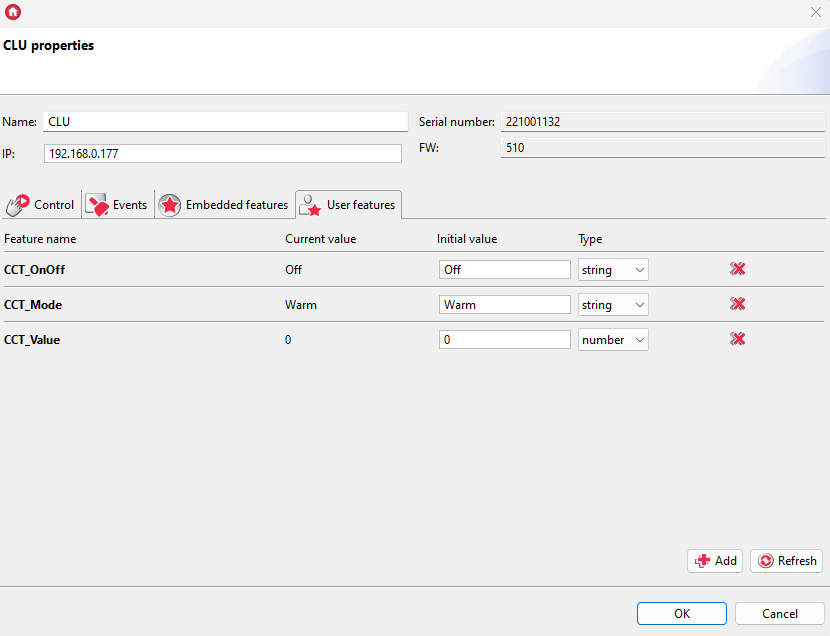
2. Go to the "User Features" tab and create the following features:
- CCT_OnOff - current state of the LED circuit - initial value Off.
- CCT_Mode - current direction of color change - initial value Warm,
- CCT_Value - current light color value - initial value 0 ,
Logic configuration
1. The following scripts will be used to fully support the functionality:
- LEDCCT_HoldTemperature - Color change operation with push button,
- LEDCCT_OnValueChange - Status update,
- LEDCCT_CheckMode - Change of state (flag) of color change,
- LEDCCT_SliderTemperature - Support for color change using a slider,
- LEDCCT_Switch - support for controlling the LED circuit on an on/off basis.
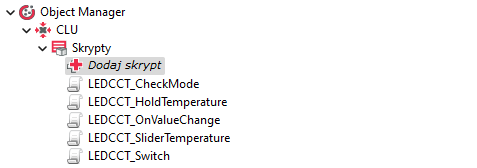
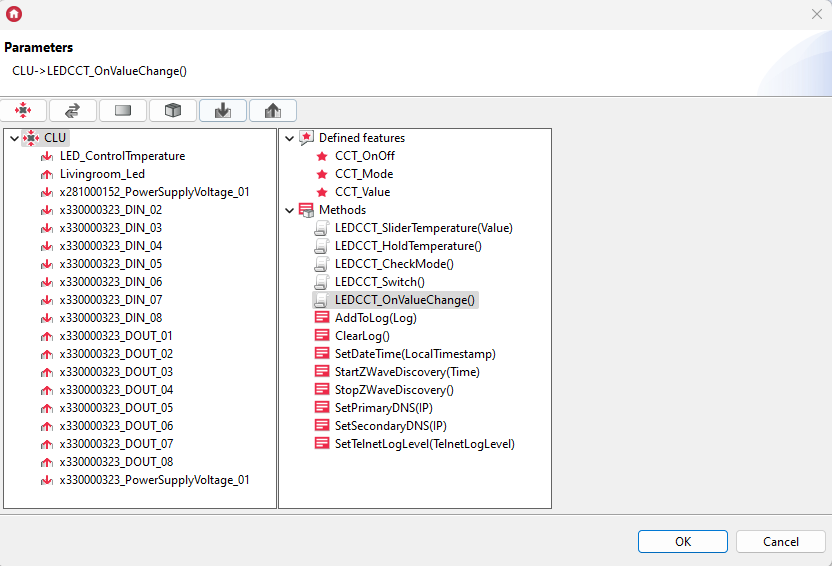
In order to create a script, click the Add script field in the object tree in the Object Manager
2. Prepare the LEDCCT_HoldTemperature script:
local offset = 5
if CLU->CCT_Mode == "Warm" then
CLU->Livingroom_Led->SetRedValue(CLU->CCT_Value+offset)
CLU->Livingroom_Led->SetGreenValue(255-CLU->CCT_Value-offset)
else
CLU->Livingroom_Led->SetRedValue(CLU->CCT_Value-offset)
CLU->Livingroom_Led->SetGreenValue(255-CLU->CCT_Value+offset)
end
CLU->CCT_Value = CLU->Livingroom_Led->RedValue
3. Prepare the LEDCCT_OnValueChange script:
if CLU->Salon_Led->RedValue == 0 and CLU->Salon_Led->GreenValue == 0 then
CLU->CCT_OnOff=0
else
CLU->CCT_OnOff=1
end
4. Prepare the LEDCCT_CheckMode script
local mode
if CLU->Livingroom_Led->RedValue == 0 then
CLU->CCT_Mode = "Warm"
end
if CLU->Livingroom_Led->RedValue == 255 then
CLU->CCT_Mode = "Cold"
end
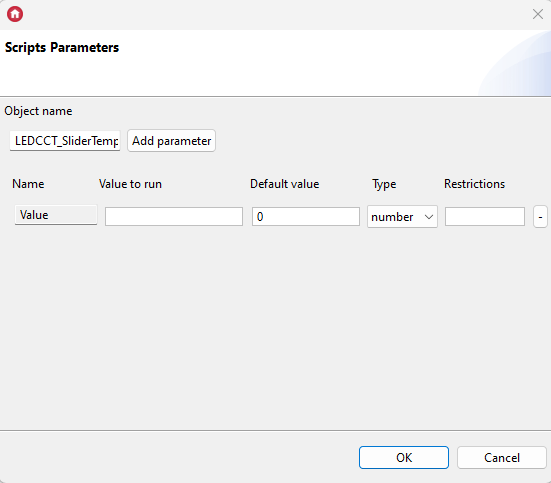
5. Prepare the LEDCCT_SliderTemperature script
CLU->CCT_Value = Value
CLU->Livingroom_Led->SetRedValue(CLU->CCT_Value)
CLU->Livingroom_Led->SetGreenValue((255-CLU->CCT_Value))
CLU->LEDCCT_CheckMode()
for the script, add a parameter, e.g. named value.
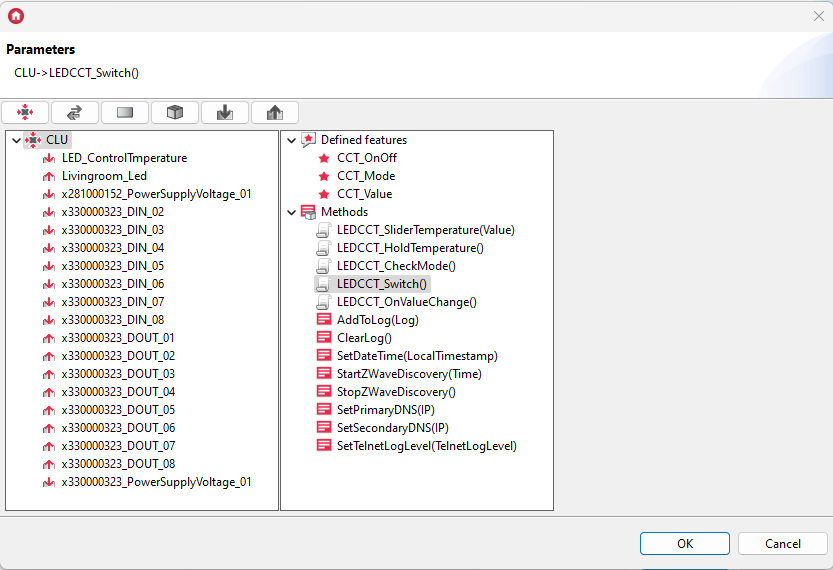
6. Prepare the LEDCCT_Switch script
if CLU->Livingroom_Led->RedValue == 0 and CLU->Livingroom_Led->GreenValue == 0 then
CLU->Livingroom_Led->SetRedValue(CLU->CCT_Value)
CLU->Livingroom_Led->SetGreenValue(255-CLU->CCT_Value)
else
CLU->Livingroom_Led->SetRedValue(0)
CLU->Livingroom_Led->SetGreenValue(0)
end
Configuration of input devices
1. Give the name of the button that will be responsible for temperature control, e.g.: LED_ControlTmperature.
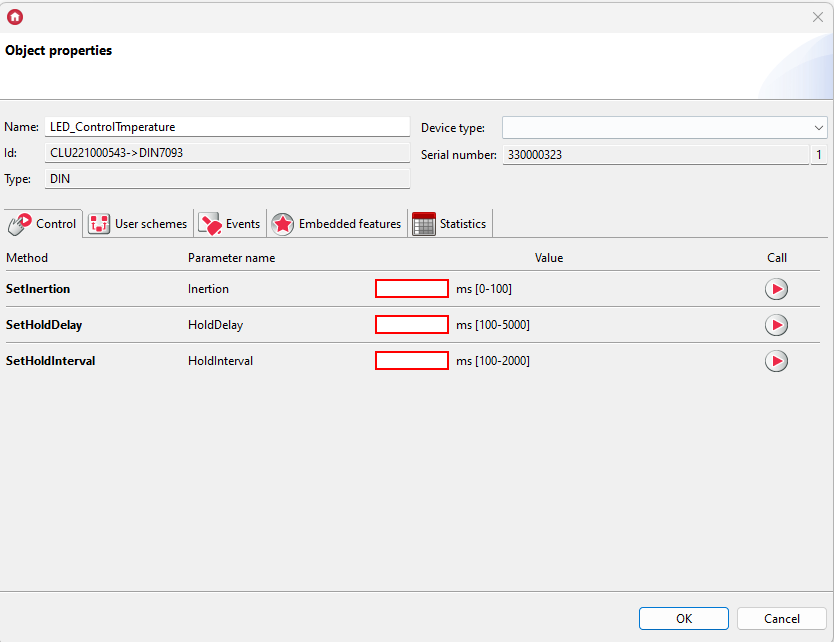
2. Go to the "Embeded features" tab and set the HoldDelay and HoldInterval parameters as below.
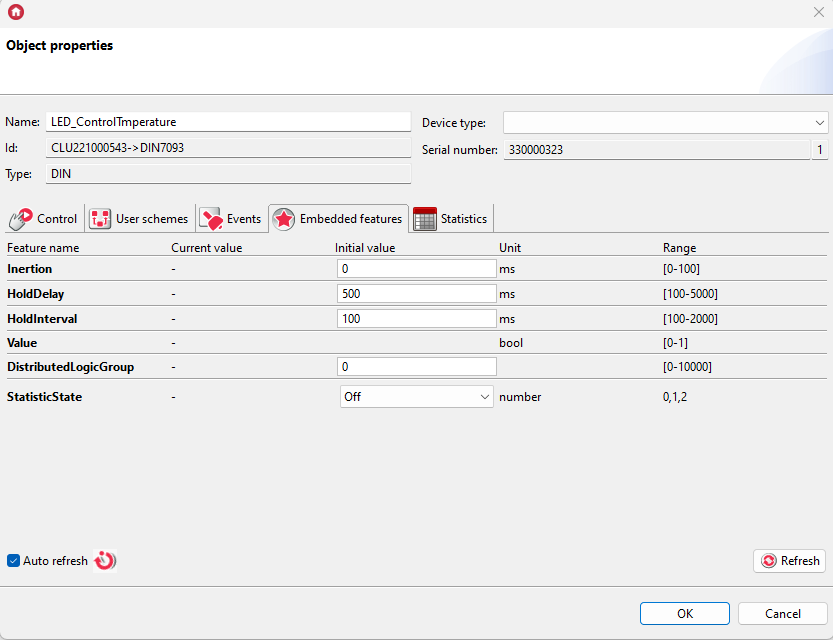
- the HoldDelay feature specifies the time after which the system will start to recognize the given impulse (signal) as the OnHold event,
- the HoldInterval feature defines the interval with which the OnHold event will be executed.
Go to the "Events" tab and assign appropriate commands to the following events.
- for the OnSwitchOff event

- for the OnHold event - it will be responsible for handling the color change. The OnHold event is an event executed cyclically every time placed in the HoldInverval proper

- for the OnClick event - it will be responsible for on/off control
Configuration of output devices
1. Give a name to the RGBW LED module that will control the color, e.g. Livingroom_Led.
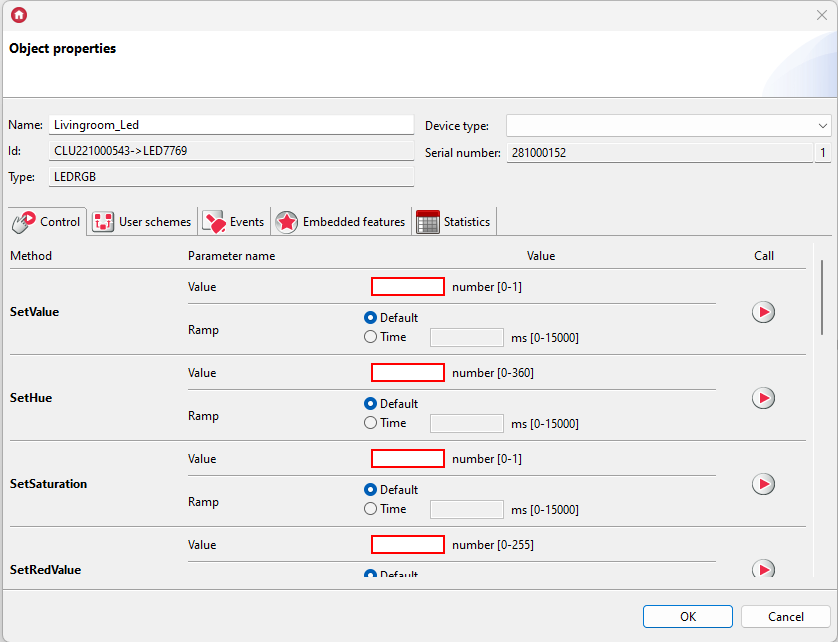
2. Go to the "Events" tab and assign the script to the OnValueChange event.
Sending configuration to the system
1. After making all the changes, send the configuration to the CLU using the button below on the toolbar:

Supporting another two-color LED strip using the same module will require control using subsequent channels of the RGBW LED module - B and W. For this purpose, for the next LED circuit, follow the above instructions analogously.
Creating the myGrenton interface
1. Create an interface
2. Add an ON_OFF widget and configure it as follows: 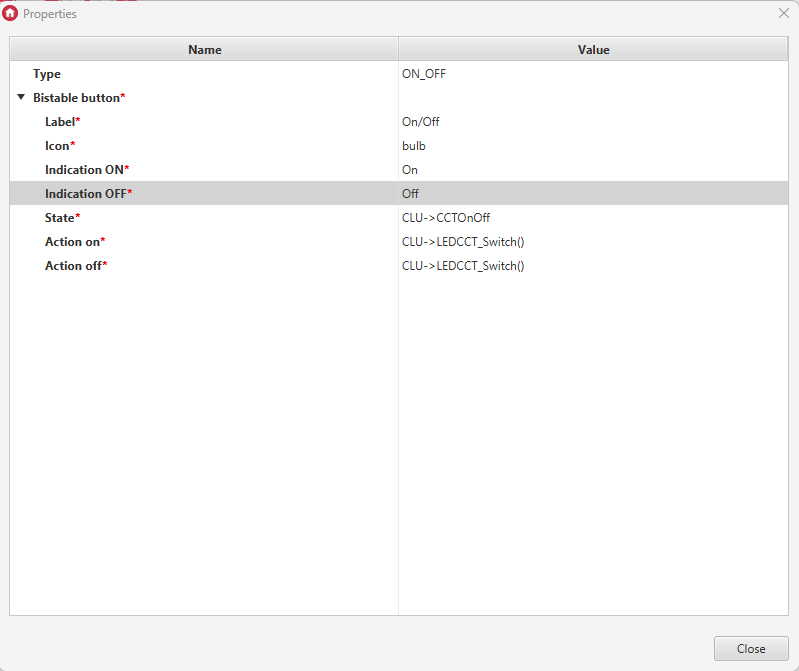 3. Add a SLIDER widget and configure it as follows:
 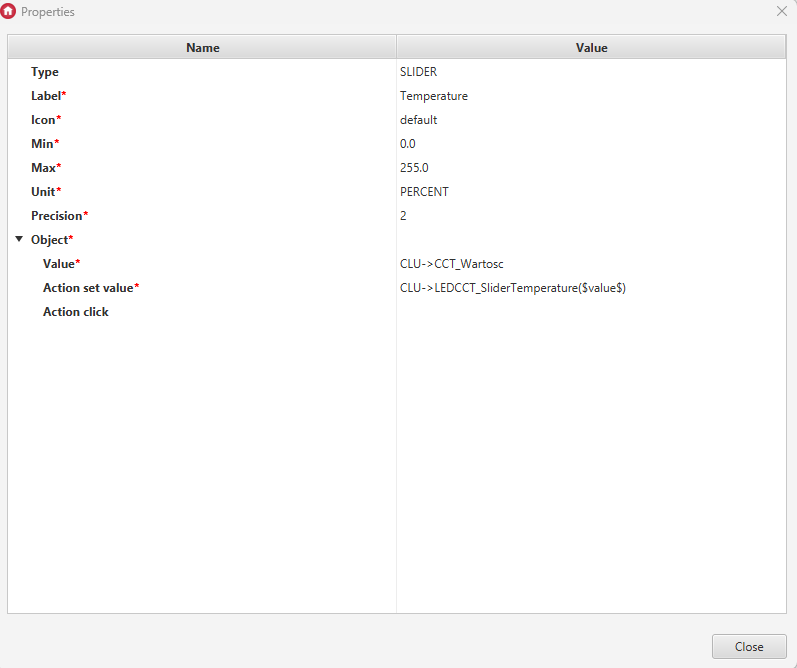 4. Send the interface to your mobile device
Checking the operation of the configuration
The following video shows how the created configuration works