In Grenton system, the control of heating is realized on the basis of virtual object Thermostat. This object can successfully be used for controlling floor heating. In such a solution, the crucial aspect is securing heating from overheating. Too high temperature can adversely influence the material of which the floor is made and reduce the comfort of using such type of heating.
To realize this functionality you will need:
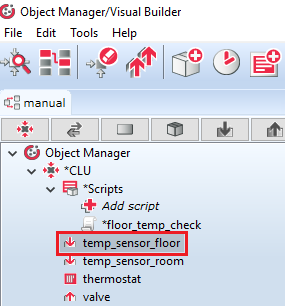
- CLU central unit – in the exemplary project named CLU
- two temperature sensors
- mounted in the floor, for example, Dallas DS18B20 or analogue LM35 – in the exemplary project named temp_sensor_floor,
- mounted in the place of windchill (1,2-1,5m), for example, temperature sensor in touch panel, Dalllas DS18B20 or analogue LM35 – in the exemplary project named temp_sensor_room
- analogue module for servicing 1-Wire and analogue 0-10V sensors
- input module for controlling valve – RELAY or analogue ANALOG 0-10V – in the exemplary project the module of relay outputs was applied; the controlled output was named valvue
- the environment for creating the system logic - Object Manager
Realization of aforementioned functionality will require the creation of:
- the script – in the exemplary project named floor_temp_check
- Virtual Object Thermostat - in the exemplary project named thermostat
- a global variable that holds the maximally permissible value of the floor temperature - in the exemplary project named max_floor_temp
The configuration of CLU central unit
1. Double-click on the CLU icon to enter the module settings: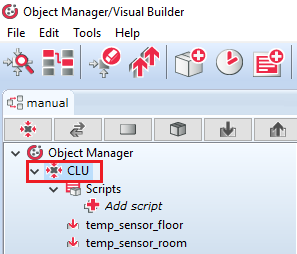
2. Go to "User features" tab and create a global variable of number type:
- max_temp – maximal permissible floor temperature
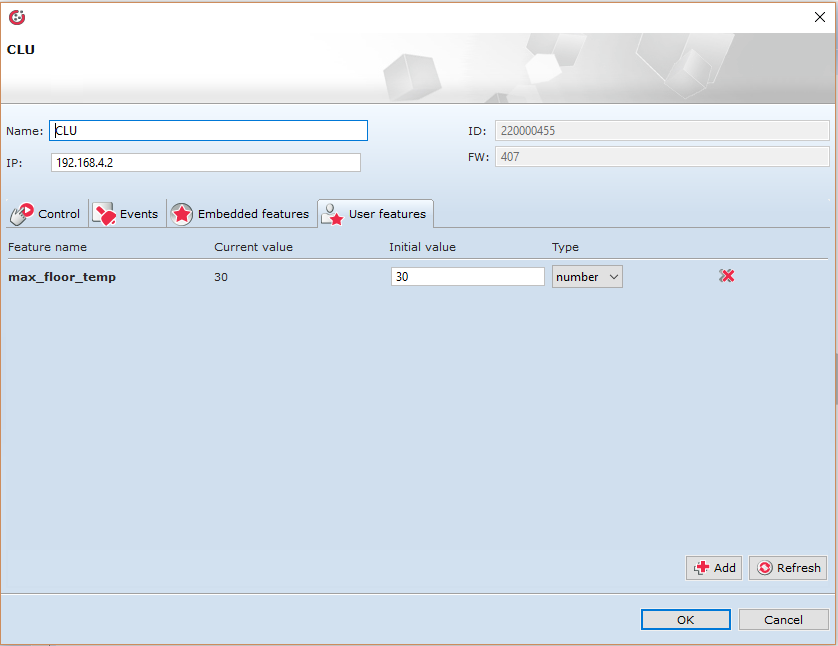
The maximally permissible value of temperature in the area of constant residence may differ depending on the material of which the floor is made. Familiarize with the documentation of the floor producer. The most often chosen maximal value is 29-30°C.
Virtual Object THERMOSTAT
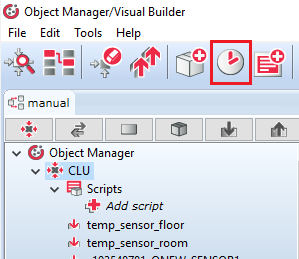
1. Click on the clock symbol to go to the window of creating virtual objects:
2. From the drop-down list chose "Thermostat" position. This object will be used for managing the temperature in a given heating area.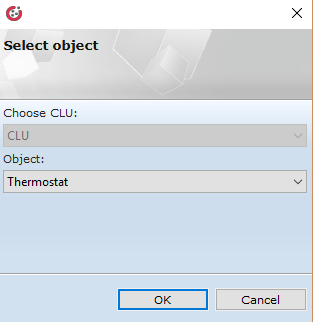
3. Indicate the temperature sensor responsible for measure the wind chill of a given heating area as the source of the object. As the output receiver responsible for controlling the valve or floor heating actuator – in the analyzed example - valve.
If all steps were carried out correctly, the thermostat window in Inbuilt tab should be as follows:
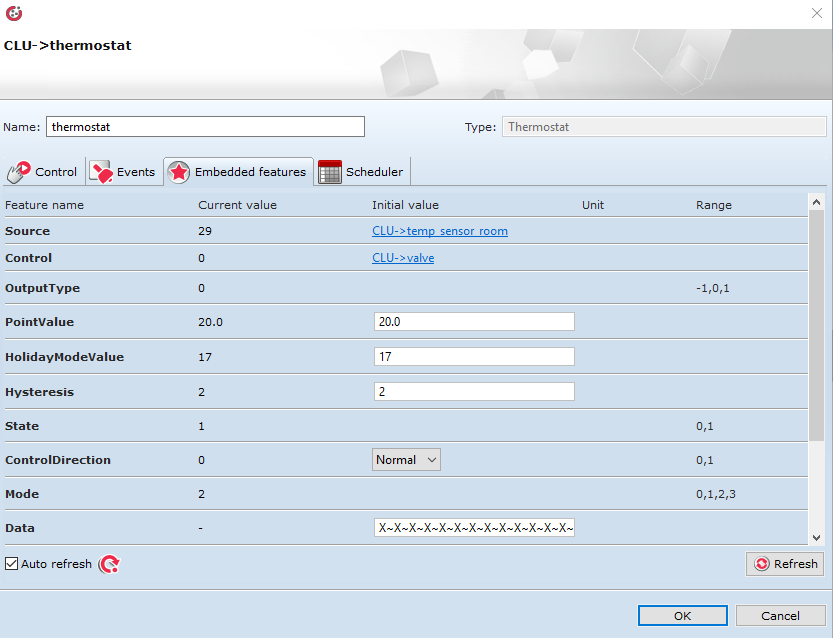
4. The detailed instruction of virtual object Thermostat configuration can be found on our support portal: Virtual Object THERMOSTAT
5. Confirm the changer with OK button
Logic configuration
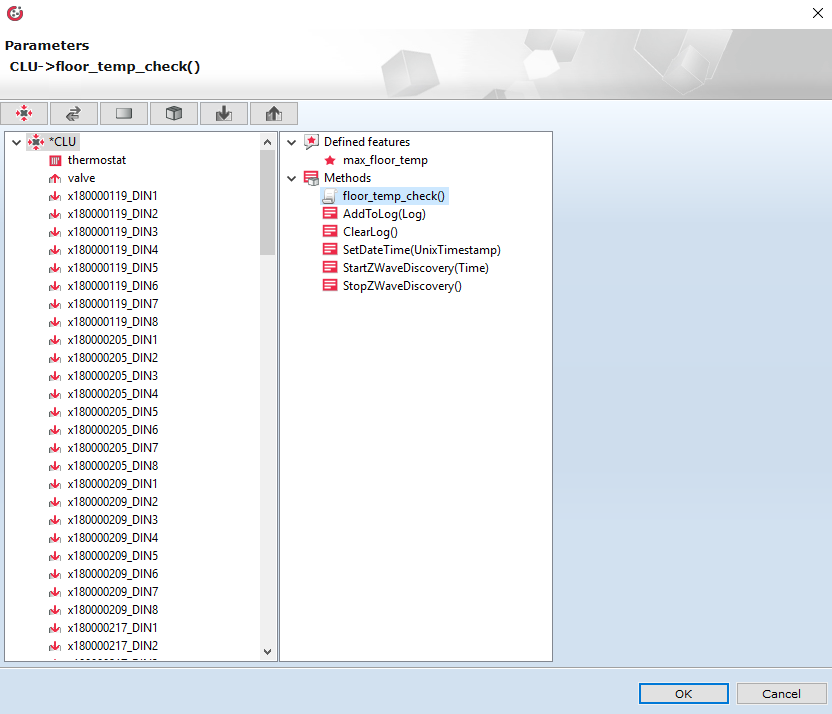
1. Create a script for managing work. In the analysed case named "floor_temp_check"
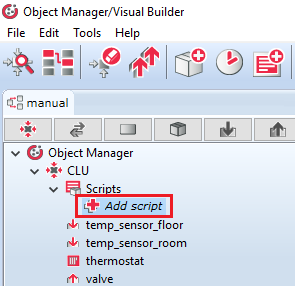
2. Create a script realizing the logic of the system through the use of Components tray on the right side of the Object Manager software window. The information on how to create scripts in Grenton system is available HERE . The connections and logic conditions between functional blocks should look as shown in the below scheme:

Below there is a list of components and the procedure of creating them.
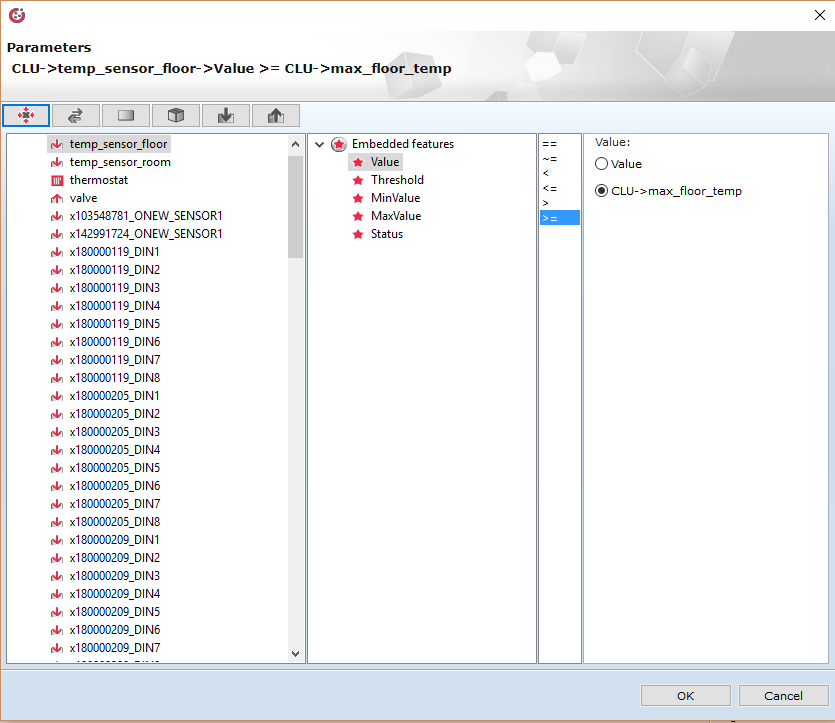
- Condition > temp_sensor_floor > Embedded Features: Value > Logic Condition: ">=" > Value: Features > CLU > Embedded Feature: max_floor_temp
Checking if the floor temperature reached the value of maximal permissible floor temperature
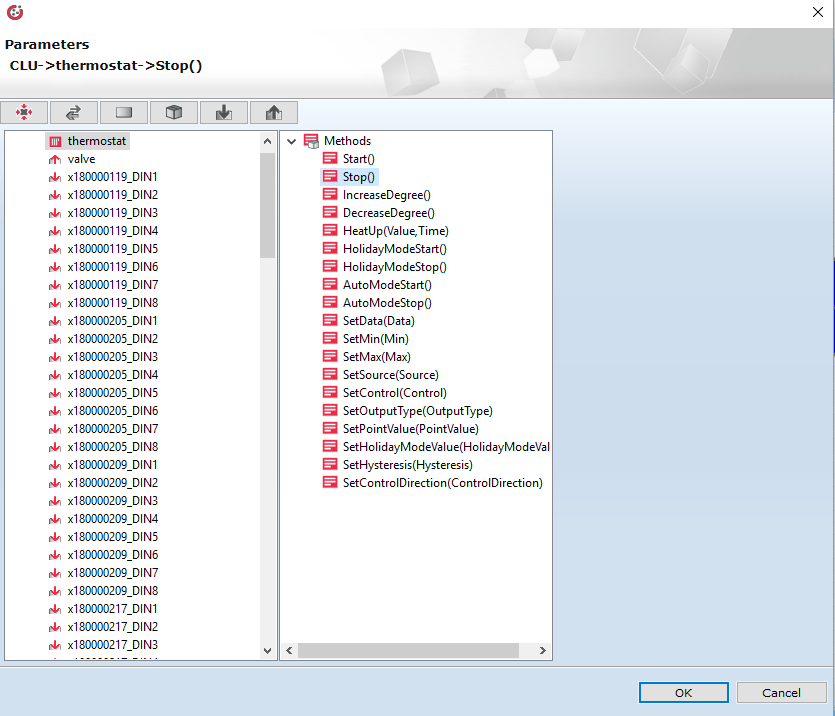
- Action > Virtual Object: thermostat > Methods: Stop()
Switching off the work of thermostat

- Action > Virtual object: thermostat > Methods: Start()
Switching on the work of thermostat
The above logic in text mode is presented as follows:
if(CLU->temp_sensor_floor->Value>=CLU->max_floor_temp) then
CLU->thermostat->Stop()
else
CLU->thermostat->Start()
end
3. Confirm the changes with OK button
The configuration of input/output devices
1. On the modules list double click on the temp_sensor_floor object and in Events tab, assign the command launching the created script to the OnChange event.
The field "Assiged commands" will look as follows:
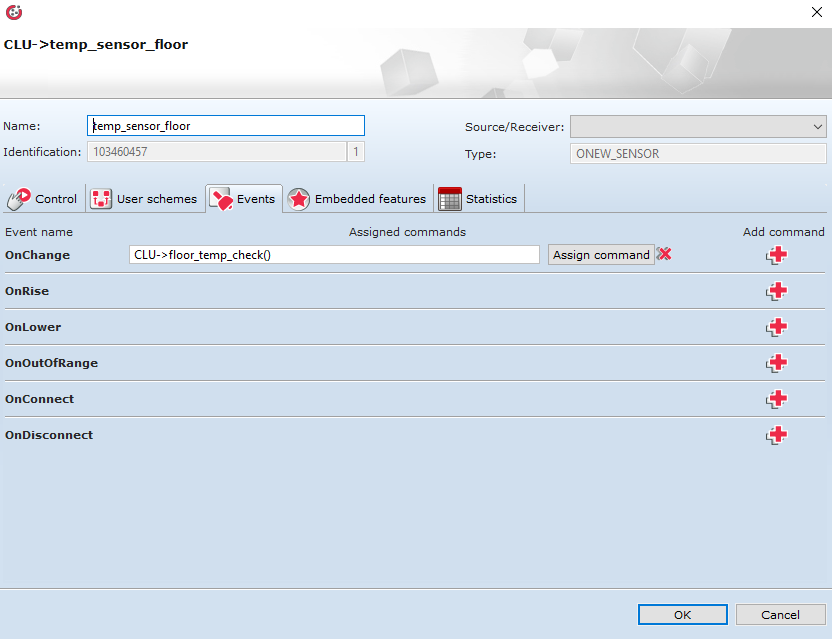
2. Confirm the changes with OK button
Sending the configuration to the system
After entering all changes, send the configuration to CLU by using the below button on the toolbar:

